基於上一篇的基礎語法可以做出簡單的table,但果要客製化每個cell的樣式呢?
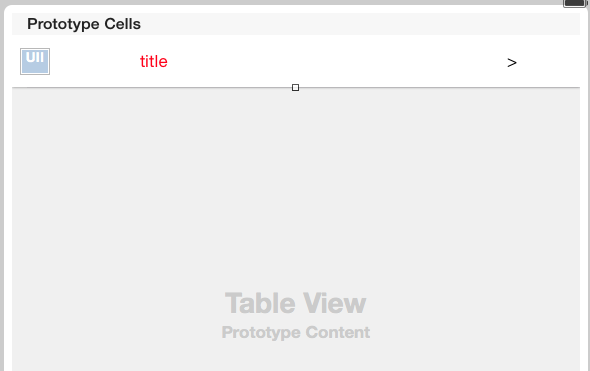
在storyboard拉cell並且佈置成自己要的樣子
建立相對應的cell Class ```swift
super.init(style: style, reuseIdentifier: reuseIdentifier);
}
//繼承UITableViewCell一定要override的function
public required init(coder aDecoder: NSCoder) {
super.init(coder: aDecoder);
}
1
2
3
4
5
6
7
8
9
10
11
12
13
14
15
16
17
18
19
* 在storyboard指定該cell的class為CustomerCell,並且設定Identifier [](http://1.bp.blogspot.com/-ccc0-6L5vYk/VPQCFF6QKwI/AAAAAAAAEWY/sOW8wxdPRSc/s1600/%E8%9E%A2%E5%B9%95%E5%BF%AB%E7%85%A7%2B2015-03-02%2B%E4%B8%8B%E5%8D%882.19.52.png) [](http://4.bp.blogspot.com/-ZcUAw2yn9OU/VPQCnODddHI/AAAAAAAAEWg/Xs5EhzwGDsI/s1600/%E8%9E%A2%E5%B9%95%E5%BF%AB%E7%85%A7%2B2015-03-02%2B%E4%B8%8B%E5%8D%882.25.39.png) * 把對應的控制項建立起關聯 ```swift import Foundation import UiKit public class CustomerCell:UITableViewCell{ @IBOutlet weak var lblTitle: UILabel! //title的label @IBOutlet weak var imgIcon: UIImageView! //icon的小圖片 override init(style: UITableViewCellStyle, reuseIdentifier: String?) { super.init(style: style, reuseIdentifier: reuseIdentifier); } public required init(coder aDecoder: NSCoder) { super.init(coder: aDecoder); } }
改寫cellForRowAtIndexPath這個事件 ```swiftcell = CustomerCell(style: UITableViewCellStyle.Default, reuseIdentifier: identifier);
case 0:
   cell?.imgIcon.image = UIImage(named: "icon-factory");
   break;
case 1:
   cell?.imgIcon.image = UIImage(named: "icon-location");
   break;
case 2:
   cell?.imgIcon.image = UIImage(named: "icon-money");
   break;
default:
   break;
```
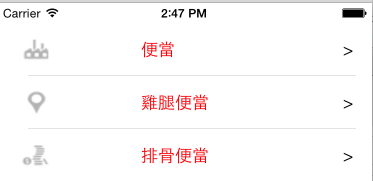
最後呈現的結果

