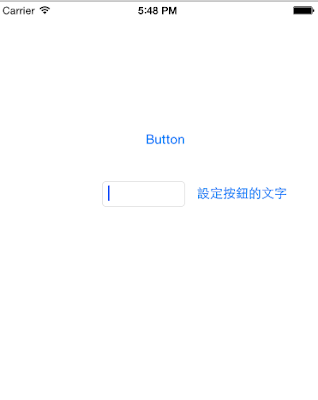
很多APP都會有一些各人化設定檔,方便下次打開APP可以依照個人的喜好設定做出最適合的調整,接下來就實作如何將個人的設定檔存起來並在下次打開APP時Show出來
- 首先先拉一個畫面,輸入框,確定按鈕,呈現文字的按鈕,我們的目標是在輸入框輸入的文字會被系統儲存起來,在下次App重開時依然顯示最後設定的文字

- 基本的code如下,只要在輸入框填好後按下確定按鈕就可以更改文字了,但你只要重開APP他就又會回到最原本Button的文字 ```swift
import UIKit
class plistViewController: UIViewController {
@IBOutlet weak var txtbox: UITextField! //輸入文字框
@IBOutlet weak var btnShowText: UIButton! //show文字的button
@IBOutlet weak var btnSetting: UIButton! //確定按鈕
override func viewDidLoad() {
}super.viewDidLoad();
@IBAction func btnSetting_click(sender: AnyObject) {
}//將輸入的文字設定給btnShowText btnShowText.setTitle(txtbox.text, forState: UIControlState.Normal);
}
1 | [](http://1.bp.blogspot.com/-9CI9oydHno0/VPWJqOmri8I/AAAAAAAAEd4/dbIiK5hekEI/s1600/image.gif) |
接下來將輸入的文字改存到plist中,然後按鈕文字的來源改成Setting.plist,全部程式碼如下 ```swift
import UIKit
class plistViewController: UIViewController {
@IBOutlet weak var txtbox: UITextField! //輸入文字框
@IBOutlet weak var btnShowText: UIButton! //show文字的button
@IBOutlet weak var btnSetting: UIButton! //確定按鈕
override func viewDidLoad() {
super.viewDidLoad();
loadBtnText();
}
private func loadBtnText(){
//button預設的字由Setting plist來
btnShowText.setTitle(getSettingValue(), forState: UIControlState.Normal);
}
@IBAction func btnSetting_click(sender: AnyObject) {
//將輸入的文字設定給btnShowText
//btnShowText.setTitle(txtbox.text, forState: UIControlState.Normal);
//修改成將輸入的文字存到Setting.plist後,在由那邊load給button
Set_SettingPlist_Value(txtbox.text);
loadBtnText();
}
//取得Setting.plist裡btnText欄位得值
private func getSettingValue() -> String{
var value:String!;
//取得document folder底下的Setting.plist路徑
let SettingPath = String(format: “%@/Documents/Setting.plist”, arguments:[NSHomeDirectory()]);
var dic:NSMutableDictionary? = NSMutableDictionary(contentsOfFile: SettingPath);
//欄位名稱
if (dic?.objectForKey(“btnText”) != nil){
value = dic!.objectForKey(“btnText”) as String;
}
return value;
}
//把值存到Setting.plist裡面
private func Set_SettingPlist_Value(value:String){
let SettingPath = String(format: “%@/Documents/Setting.plist”, arguments:[NSHomeDirectory()]);
var dic:NSMutableDictionary = NSMutableDictionary(contentsOfFile: SettingPath)!;
if (dic.objectForKey(“btnText”) != nil) {
dic.setValue(value, forKey: “btnText”);
//true表示IOS會先將資料寫入一個輔助檔案中,然後再將這個檔案改為最後真正的目的地,避免出現錯誤
dic.writeToFile(SettingPath, atomically: true);
}
}
}
1 |
|
也就是說複製過一次後,之後的欄位有增減都無法改到Documents資料夾底下的那份plist了,所以只能刪除重裝!!